How to Change Batteries in Coast Flashlight: A Simple Guide
In this article, we will provide a comprehensive guide on how to change the batteries in your Coast flashlight. Whether you own a rechargeable model or one that requires standard batteries, learning the proper method for battery replacement is essential for maintaining optimal performance.
Coast flashlights are known for their durability and reliability, making them a popular choice for outdoor enthusiasts and everyday users alike. However, understanding how to properly change the batteries can significantly extend the life of your flashlight and ensure you are never left in the dark.
We will cover different flashlight models, common battery types used, and troubleshooting tips in case of any difficulties during the process. Our goal is to empower you with the knowledge needed to keep your Coast flashlight operating at its best, ensuring you have reliable light whenever you need it.
Table of Contents
- Understanding Your Coast Flashlight Model
- Preparing for Battery Replacement
- Step-by-Step Guide to Changing Batteries
- Troubleshooting Battery Replacement Issues
- Maintenance Tips for Your Coast Flashlight
- Frequently Asked Questions
Understanding Your Coast Flashlight Model
Before changing the batteries in your Coast flashlight, it’s crucial to understand the specific model you own, as different models have varying battery requirements. Coast flashlights range from compact penlights to heavy-duty tactical lights, and knowing your model will guide you in the replacement process.
Popular Coast Flashlight Models
Coast offers a variety of flashlight models, each designed for specific needs. Some popular models include:
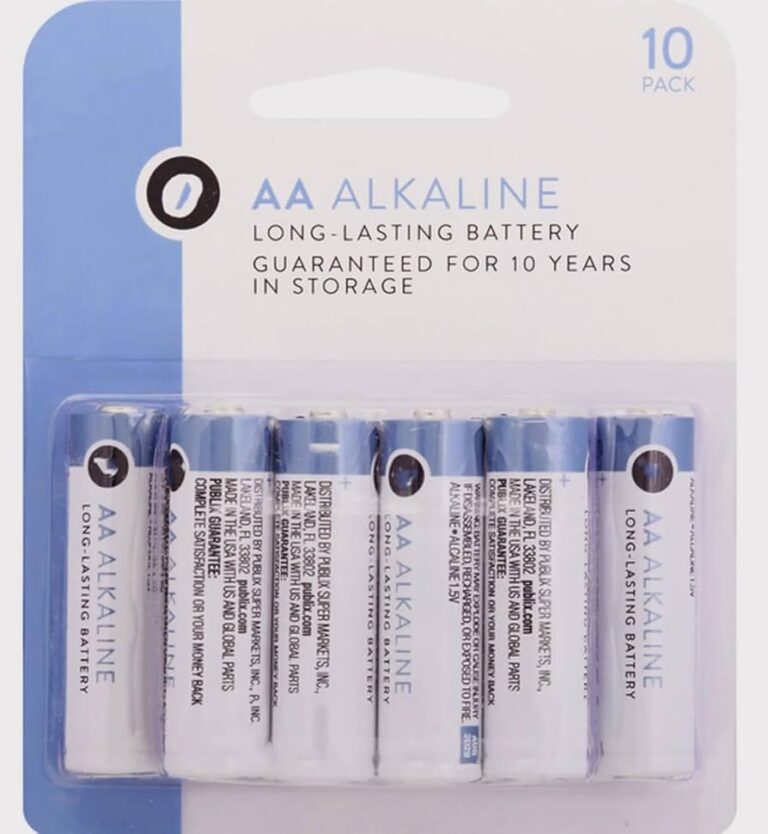
- Coast G32: A compact flashlight that uses 2 AA alkaline batteries.
- Coast HP7R: A rechargeable model that can also use standard batteries.
- Coast PX15R: A versatile flashlight suitable for various applications.
Battery Types Used in Coast Flashlights
Coast flashlights typically use one of several battery types:
- AA Batteries: Common in many models, including the Coast G32 and HP14.
- AAA Batteries: Used in smaller models for compact design.
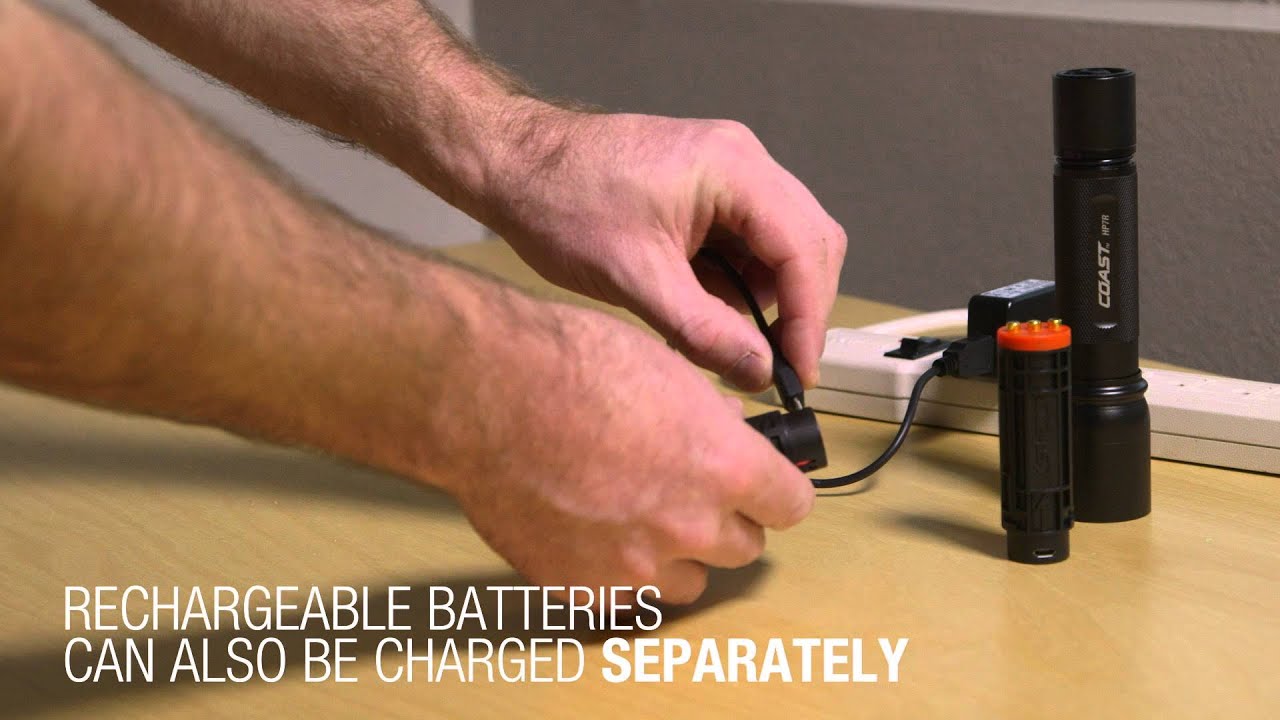
- Rechargeable Lithium-Ion Batteries: Found in models like the HP7R and other high-performance lights.
Identifying Your Model Number
To identify your flashlight model, look for a number usually engraved on the body or found on the packaging. Knowing your model number helps in sourcing the correct replacement batteries.
| Model | Battery Type | Number of Batteries |
|---|---|---|
| Coast G32 | AA Alkaline | 2 |
| Coast HP7R | Rechargeable Li-Ion or AA | 1 |
| Coast PX15R | Rechargeable Li-Ion | 1 |
This table provides a quick reference for some popular Coast flashlight models and their respective battery requirements. Knowing the battery type and quantity for your specific model is essential for effective battery replacement.
For example, the Coast G32 requires two AA batteries which can be easily found in most stores. In contrast, the HP7R offers flexibility by allowing both rechargeable and standard batteries, catering to different user preferences.
Understanding these differences can help users choose the right batteries during replacements and ensure optimal performance of their flashlights.
Preparing for Battery Replacement
Before you start the battery replacement process, it’s important to prepare properly. This ensures a smoother and safer experience while handling your flashlight.
Tools Required for Battery Replacement
Generally, you will need very few tools to change your flashlight batteries. However, having the right tools can help, especially if components are stuck.
Here’s a list of useful tools:
- Rubber gloves (for grip and protection)
- Strap wrench (to help remove stuck caps)
- Soft cloth (to clean components)
Safety Precautions
Safety should always come first. Here are some tips to ensure a safe battery replacement:
- Work in a well-lit area to avoid accidents.
- Dispose of old batteries properly to prevent leakage hazards.
- Ensure the flashlight is turned off before starting.
Checking for Corrosion
Before replacing the batteries, check the battery compartment for any signs of corrosion, which can occur due to battery leakage. If corrosion is present, clean it carefully with a soft cloth or a dedicated battery terminal cleaner.
| Tool | Use |
|---|---|
| Rubber Gloves | Provide grip and protect your hands during battery replacement. |
| Strap Wrench | Assist in loosening stuck components without damaging them. |
| Soft Cloth | Clean any corrosion or dirt from battery contacts. |
This table outlines essential tools required for battery replacement in Coast flashlights. The use of rubber gloves prevents slipping while handling batteries, especially if they are corroded.
A strap wrench is invaluable when dealing with stuck components, a common issue that can occur after prolonged use. A soft cloth is necessary for routine maintenance, ensuring that the battery contacts remain clean for optimal electrical connection.
Having these tools at hand can make the battery replacement process easier and more efficient, helping users maintain their flashlights in peak condition.
Step-by-Step Guide to Changing Batteries
Changing the batteries in your Coast flashlight can be accomplished with a few straightforward steps. Follow this guide to ensure a smooth replacement process.
Removing the Tail Cap
Start by unscrewing the tail cap, which is typically located at the end of the flashlight. You may need to apply some force if it is stuck, potentially using a strap wrench or rubber gloves for a better grip.
Inserting New Batteries
Once the tail cap is removed, you will have access to the battery compartment. Remove any old batteries and insert the new ones, ensuring they are placed in the correct orientation as indicated in the compartment.
Reassembling the Flashlight
After replacing the batteries, replace the tail cap by screwing it back on securely. Ensure it is tight to maintain water resistance and prevent dust from entering.
| Step | Action |
|---|---|
| 1 | Unscrew the tail cap. |
| 2 | Remove old batteries. |
| 3 | Insert new batteries (correct orientation). |
| 4 | Screw the tail cap back on. |
This table provides a clear sequence of steps to follow when changing the batteries in your Coast flashlight. Each step is essential for ensuring that the flashlight is reassembled correctly and functions optimally.
Removing the tail cap is typically straightforward; however, users should be prepared for the possibility of components being stuck due to corrosion. Properly orienting the batteries is critical, as incorrect installation can lead to further issues or damage.
Finally, securely screwing the tail cap back on ensures that the flashlight remains water-resistant, which is particularly important for outdoor use.
Troubleshooting Battery Replacement Issues
Occasionally, issues may arise during the battery replacement process. Understanding common problems and their solutions can save you time and frustration.
Stuck or Seized Components
If the tail cap or any other component is stuck, try using a strap wrench or rubber gloves for enhanced grip. In extreme cases, applying a small amount of penetrating oil can help loosen stuck parts.
Problems With Battery Fit
After inserting new batteries, if they do not fit properly, check the orientation and ensure that the correct type of batteries is being used. If the compartment appears damaged, it may require professional repair.
Dealing with Battery Leakage
If you discover battery leakage, carefully remove the batteries and clean the compartment immediately. Use a soft cloth or a brush to remove any corrosion, and consider replacing the flashlight if significant damage has occurred.
| Problem | Solution |
|---|---|
| Stuck Components | Use a strap wrench or rubber gloves; apply penetrating oil. |
| Improper Battery Fit | Check orientation and battery type; inspect for damage. |
| Battery Leakage | Remove batteries, clean compartment, assess for damage. |
This troubleshooting table highlights common issues that users may face when changing batteries in their Coast flashlights. Stuck components can often be resolved with simple tools, while improper fits typically indicate an orientation mistake or the use of incorrect batteries.
Battery leakage poses a more serious concern, as it can damage both the batteries and the flashlight itself. Regular maintenance checks can help mitigate these issues, ensuring your Coast flashlight remains functional and safe to use.
Maintenance Tips for Your Coast Flashlight
After successfully replacing the batteries, it’s essential to maintain your Coast flashlight to enhance its lifespan and performance.
Cleaning Your Flashlight
Regular cleaning is vital. Use a soft cloth to wipe down the exterior, and check the lens for dirt or scratches.
Cleaning the contacts inside the battery compartment can also prevent corrosion.
Proper Storage Practices
Store your flashlight in a cool, dry place away from extreme temperatures. Consider using a protective sheath to prevent physical damage.
Regular Battery Checkups
Periodically check the batteries, even if the flashlight is not in use. This helps prevent leaks and ensures that the flashlight is ready when needed.
| Maintenance Task | Frequency |
|---|---|
| Cleaning | Every 1-3 months |
| Checking Batteries | Monthly |
| Storage Review | Quarterly |
This maintenance table provides a straightforward schedule for keeping your Coast flashlight in excellent condition. Regular cleaning every 1-3 months helps maintain both the aesthetic and functional aspects of the flashlight.
Monthly battery checks are crucial, particularly to prevent leakage, which can lead to significant damage and safety hazards. Lastly, reviewing storage practices quarterly ensures that your flashlight is kept in optimal conditions, prolonging its operational life and reliability for future use.
Frequently Asked Questions
Can I use rechargeable batteries?
Yes, many Coast flashlights are designed to accept both rechargeable and standard batteries. Models like the HP7R are specifically equipped for this versatility.
However, always check your specific model’s requirements before using rechargeable batteries to avoid compatibility issues.
How often should I change the batteries?
The frequency of battery changes depends on usage. If your flashlight is used frequently, you may need to change the batteries every few weeks.
For occasional use, batteries can last several months. Regular checks will help you determine when it’s time for a change.
What should I do if my flashlight won’t turn on?
If your flashlight isn’t turning on, start by checking the batteries. Ensure they are installed correctly and have sufficient power.
If the batteries are fine, check for corrosion or damage in the battery compartment. If problems persist, professional repair may be necessary.
Conclusion
In conclusion, changing the batteries in your Coast flashlight is a straightforward process that can be accomplished with the right knowledge and tools. By following the steps outlined in this guide, you can ensure your flashlight remains functional and ready for use whenever you need it.
Regular maintenance and awareness of battery care can prolong the life of your Coast flashlight, providing you with reliable light for years to come. Don’t hesitate to refer back to this guide whenever you encounter issues or need to replace the batteries again.